HEXO
[toc]
一个小建议… 网上搜到的教程有很多过时的,如果真想解决不妨试试看官方文档以及插件的 GitHub 说明,有些旧版本需要插件才能实现的功能,新版本可能一个选项设定就搞定了(只不过这个选项需要自己找找..)
配置
【基础篇】hexo 博客搭建教程 - huanhao - 博客园 √√√
基于 Hexo 的全自动博客构建部署系统 - KChen’s Blog
配置步骤总结:2022.01.30
- 安装基本的东西
- 部署,和 GitHub 连接
- 设置主题(影响后续的调整)
- 安装必要的插件
- 解决图片路径问题那个 hexo-simple-image
- 替换 markdown parser (默认的 marked 对公式支持不好)
- 公式支持 hexo-filter-mathjax
基于 Hexo 的全自动博客构建部署系统 - KChen’s Blog
我是跟着这个做的,写的非常详细(虽然另一个好像更详细).. 这里就不重复总结了.. 只把初始几步的控制台输出放这里做参考. 还有后面几个可能出现困惑的地方
安装
配置安装环境 git, node.js 并确认
1 | PS C:\Users\45489> node -v |
node 安装 hexo npm install hexo-cli -g
进入一个目录作为存放博客资源的目录,然后:
1 | PS D:\> hexo init Blog |
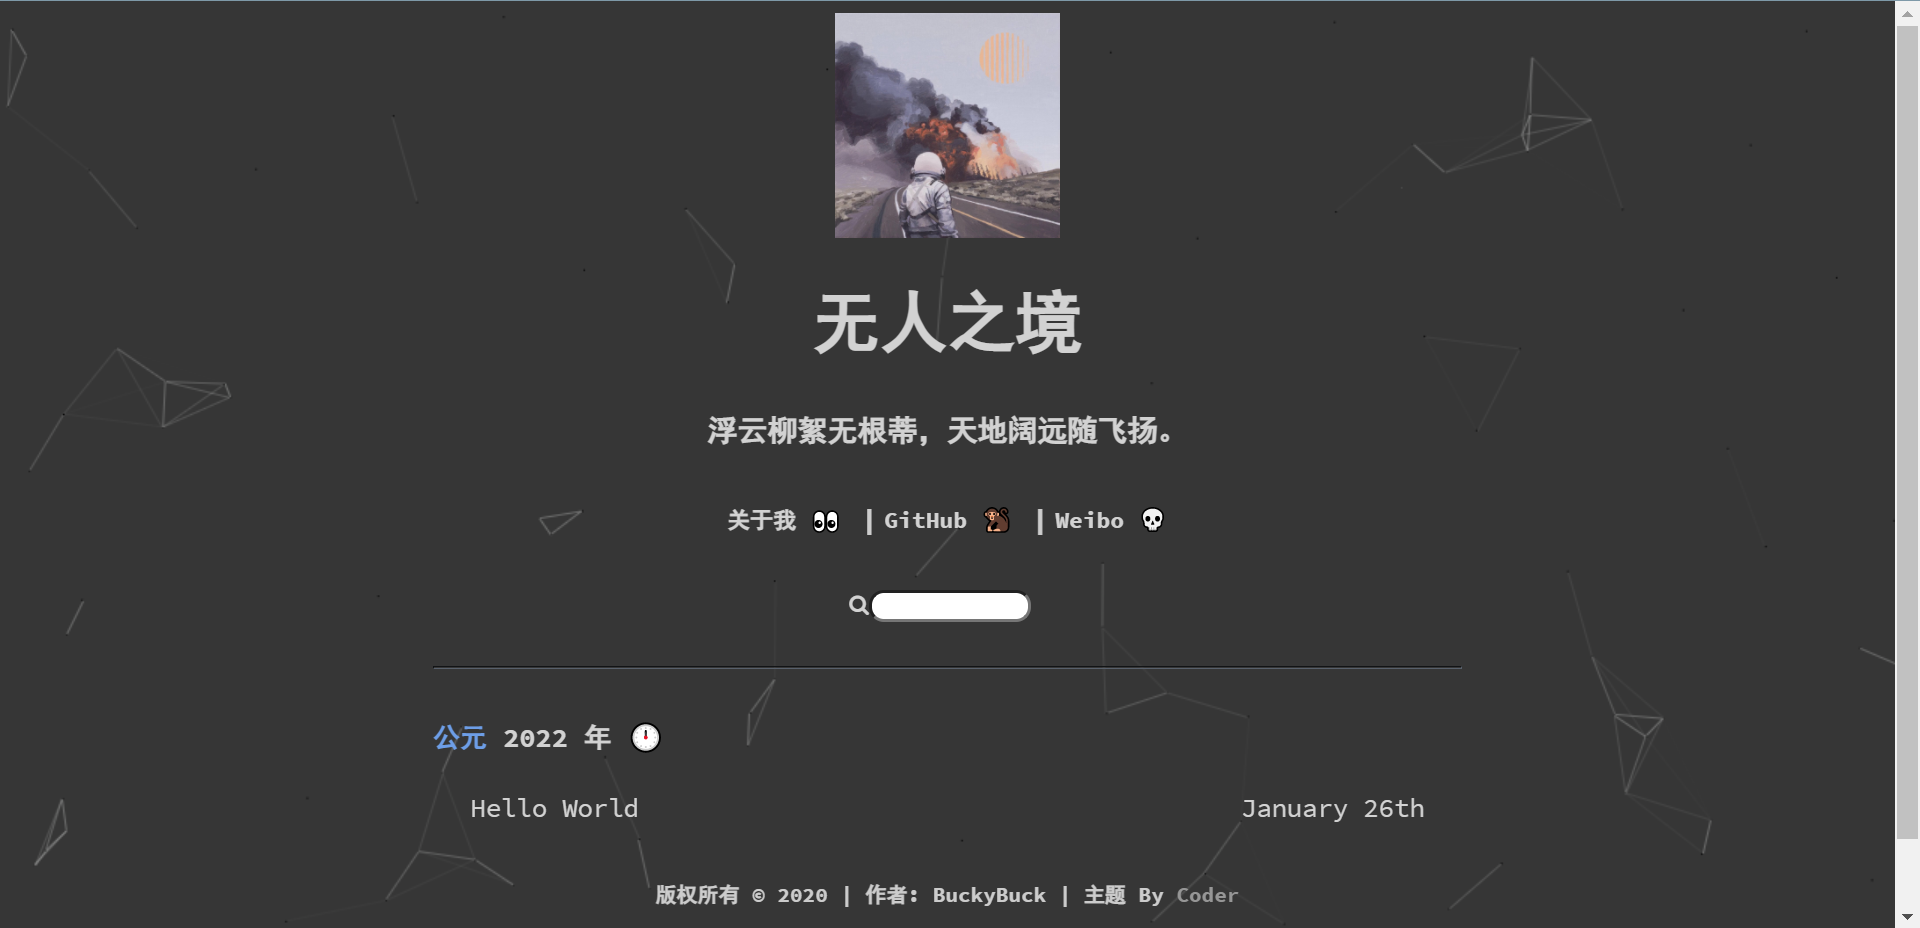
进入初始的网页:
其实来源于 source 文件夹下的 markdown 文件:[[hello-world]]
部署
好像部署过后,一般要等一会才会显示正常.
部署步骤
配置文件
_config.yml 里这样配置,把本地和仓库连接起来.
1 | deploy: |
- You will be prompted with username and password of the target repository, unless you authenticate with a token or ssh key.
在 Github 上添加本地的 ssh 的方法见后介绍. 如果不配置要输入用户名密码. - One-Command Deployment | Hexo 有详细的介绍
- 可以添加多个 deployers
看了一下
好像可以把站点部署在<你的 GitHub 用户名>.github.io子目录里,也就是下面这样.
2
3
4
5
type: git
repo: https://github.com/username/project
# example, https://github.com/hexojs/hexojs.github.io
branch: gh-pages对应的
_config.yml里url一项配置为https://username.github.io/project
注意这里 branch 应该写成 main, 那个教程里是 master 是因为老版本里 git 的主分支是 master, 现在默认的改成了 main
命令行代码
You only need one single command to deploy your site to your server. $ hexo deploy
官方文档后面有一个代码是
hexo clean&&hexo deploy
这些命令具体作用什么不知道 TODO
1 | hexo generate |
也可以简化成 hexo g -d, 看了一下命令行,大概做了三个工作
- 生成静态网页文件
- 初始化本地 git
- 推送到 GitHub 的制定仓库上
生成 SSH key 并与 Github 连接
这一块不太懂… SSH 是啥… TODO
总之 Github 有英文步骤说明,挺详细的,这里只是记录一下(翻译一下)
感觉就是本地电脑的一个 id, 告诉 Github 账号,这样不需要密码也可以修改远程的仓库
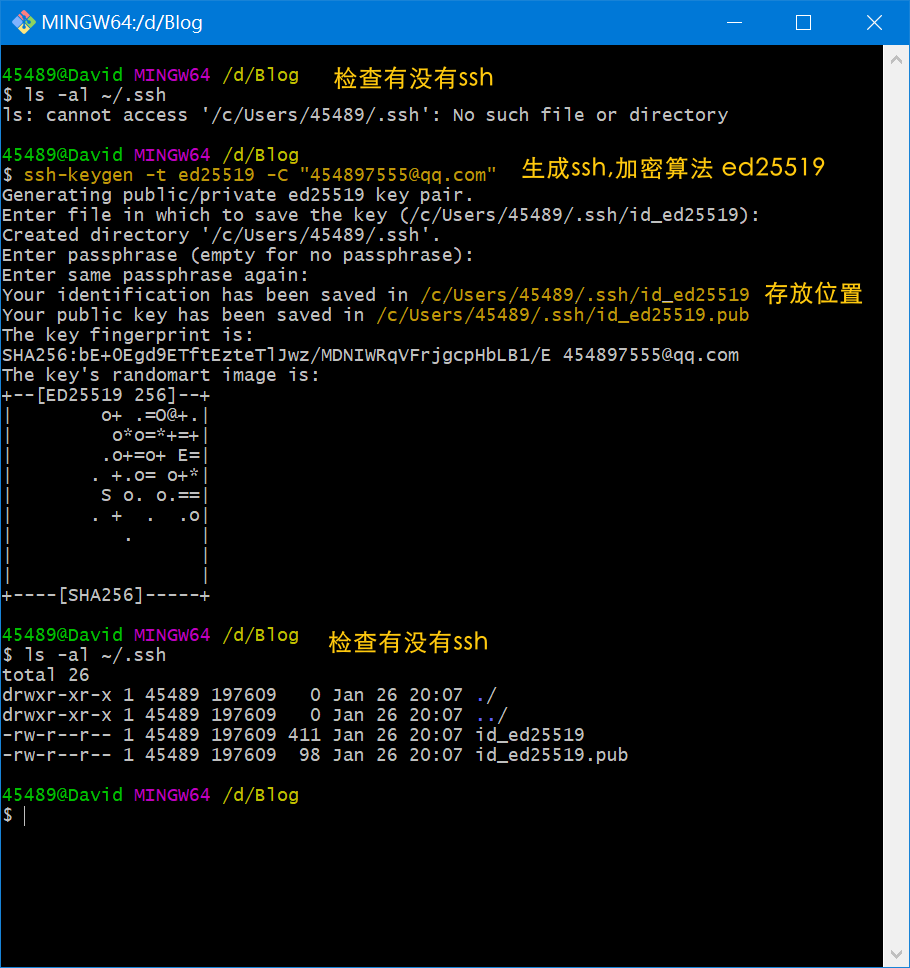
本地生成
Generating a new SSH key and adding it to the ssh-agent - GitHub Docs
1 | 45489@David MINGW64 /d/Blog |
添加到 GitHub
Adding a new SSH key to your GitHub account - GitHub Docs
关于复制 key, 可以在 git bash 里面 $ clip < ~/.ssh/id_ed25519.pub, 好像直接找到那个文件复制也可以.
会收到邮件
The following SSH key was added to your account:
DELL Aspiration SSH
SHA256:bE+0Egd9ETftEzteTlJwz/MDNIWRqVFrjgcpHbLB1/EIf you believe this key was added in error, you can remove the key and disable
access at the following location:
测试 SSH 连接
Testing your SSH connection - GitHub Docs
1 | 45489@David MINGW64 /d/Blog |
连接成功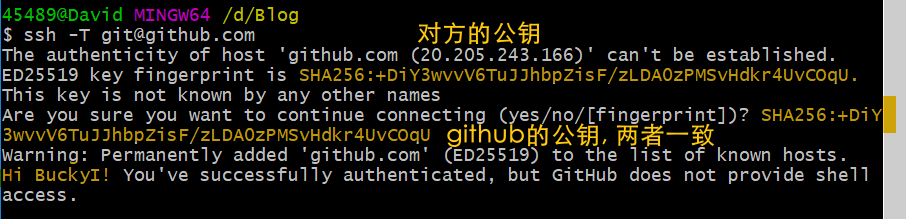
hexo 命令
1 | PS D:\Blog> hexo |
yaml 文件头
写作语法
Tag Plugins
除了普通的 markdown 语法,hexo 也有标签插件 Tag Plugins : 在文章中快速插入特定内容的插件。
感觉相当于对 markdown 的语法扩展了.
标签插件(Tag Plugins) | Hexo
标签插件不能用在 markdown 里面
[]({% post_path lorem-ipsum %})🙅♂️
例如代码:
1 |
|
实际显示:都是一样的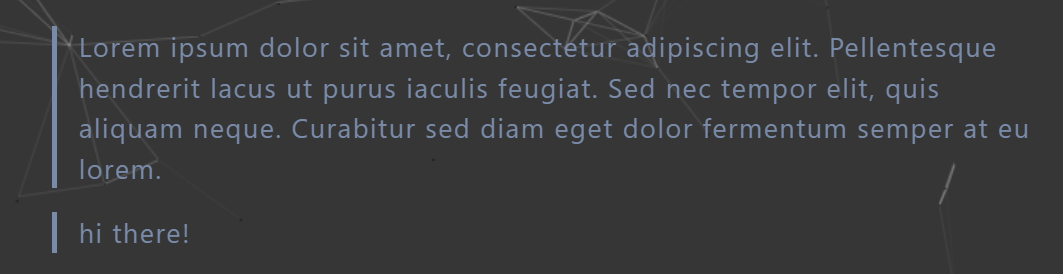
在文章中使用 <!-- more -->,那么 <!-- more --> 之前的文字将会被视为摘要。首页中将只出现这部分文字,同时这部分文字也会出现在正文之中。
1 | 摘要 |
上面这样写,主页就会显示摘要.
图片显示
根据 资源文件夹 | Hexo 以及测试,图片显示和一般 markdown 不太一样.. (有点坑)
首先,绝对路径好像是不管用的,其次,网址形式的图片见下面总结,也有一些门道.
默认状态下(也就是 post_asset_folder: false 时)图片必须放在 source 文件夹中. 图片的相对路径会以 source 为起点查找.
例如图片位于 source/images 里,就应该为![] (/images/image.jpg).
图片也可以直接放在 source 文件夹下,但是不能放在例如 _folder 这种文件夹里.
例如图片路径是 sourse/image.jpg, markdown 里面就写![] (/image.jpg)(注意不能去掉 /: ![] (image.jpg) 会不显示!)
如果 _config.yml 设置为 post_asset_folder: true, 那么每次 hexo new title, 除了对应位置生成 title.md 以外,还会生成 title 文件夹.
图片的相对路径会以 title 文件夹为起点查找.
例如 ![] (/image.jpg) 就是把图片放在 title/images 里. (这里试过了去掉/: ![] (image.jpg) 可以正常显示,放在子文件夹里也可以显示)
另外 这里 是写图片的 Tag Plugyins 语法,虽然方便很多,但是普通的 markdown 编辑器并不支持.
进一步,根据官方文档,应该这样设置:
1 | post_asset_folder: true |
上面两种方式都与一般 markdown 不一样,因为一般情况下,markdown 的图片文件路径是以本文件所在路径为起点的.
如果想要统一起来的话,安装插件可以解决,详见 后面
总结一下,要想显示图片
图片都放在(不方便,不考虑)source下面- 图片分别放在
title文件夹里面,然后安装插件统一起来
不过还有问题。.. 因为我平时写的时候,对于mark.md, 图片喜欢放在mark/pic.jpg
也许只能以后转化的时候手动挪一挪了。 - 图床
在线图片
防盗链 TO BE FINISHED
主题
官方主题网站 Themes | Hexo
可参考 【基础篇】hexo 博客搭建教程 - huanhao - 博客园
其实一般都有安装说明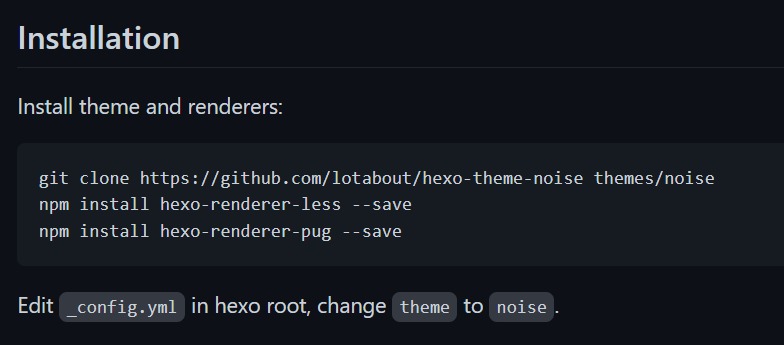
- 主题使用 coder 感觉比较简单.
- 一个更复杂的 Ocean 有点搞不好,以后熟悉了可以试一试.
Xunzhuo/Coder: A fast、pure、practical、elegant Hexo theme for Developers🔥🔥🔥 - 看到一个 Next, 好像挺受欢迎的,如果以后重度使用可以考虑一下
hexo next _ 搜索结果_哔哩哔哩_Bilibili - 好的例子~~ 可以学习一下 TODO
Yume Shoka = 優萌初華 = 有夢書架
插件
插件管理 hexagon
npm list 查看已经有的插件 (hexo 就是一套插件)
卸载时 npm uninstall xxx
卸载 hexo 插件・大专栏
配置文件中有 PLugins 模块,删除对应的插件设置;
删除 node_modules/ 目录下对应的插件文件
adamsiwiec/hexagon: A package manager for Hexo
这个一个管理插件和主题的插件。.. 不过似乎只能查看以及新增,不能帮助卸载已有插件.
1 | PS D:\Blog> hexagon --list |
图片路径问题
前面有提到,hexo 加入图片的方法与 markdown 本身不兼容. 因为路径起点不一样.
百度的话,有很多就像 这里 说要安装一个hexo-asset-image
但是 这里 说其已经失效了.
npm install hexo-image-link --save
cocowool/hexo-image-link: 当 MD 中引用本地文件时,处理生成的 html 中的图片链接。
命令行输出比较多,好像所有图片都给你输出一遍,但是哪个地方出错了无法定位,它只输出一个没有路径,并且不进行替换。
另外 test/test.jpg 能成功显示而 ./test/test.jpg 就显示不了…. 感觉不太接受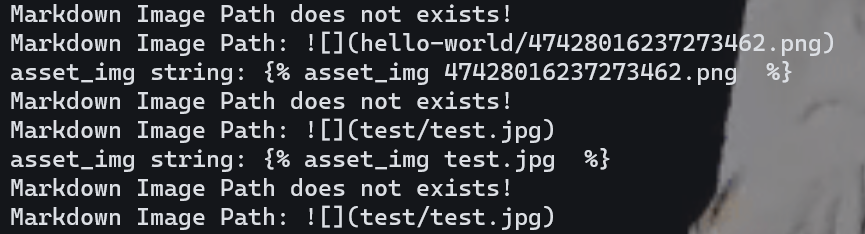
npm install hexo-simple-image --save
ZaiZheTingDun/hexo-simple-image: hexo image plugins
这个命令行不输出东西,如果对应路径没有图片,它会直接报错,这样可以定位出错的位置.Unhandled rejection [hexo-simple-image] Error when analyze path 'test.jpg', Please use correct image path.
另外这个插件对于test/test.jpg 和 ./test/test.jpg都能正常显示!
最终方案,用 hexo-simple-image
search 功能 hexo-generator-search
Ocean 中文文档 | 数学家 评论区
并不是只支持这个主题,安装了之后似乎用到搜索的都能行
首先 search 功能的开启需要依赖 hexo-generator-search 库,生成 seach 功能需要的 xml 文件。
安装依赖:
1 | npm install --save hexo-generator-search |
然后在站点目录,也就是 hexo 目录下的_comfig.yml 添加一下配置,随便什么位置均可:
1 | search: |
记得添加完保存配置后,hexo g,重新生成一次,这样 public 目录下就有 seach.xml 啦。
下面的部分我没修改但是也能搜索..
在主题 layout/_partial 目录下找到 after-footer.ejs 中修改如下内容:
1 | <% if (theme.local_search.enable){ %> |
然后就大功告成啦。
渲染器
默认的是hexo-renderer-marked
hexojs/hexo-renderer-marked: Markdown renderer for Hexo 有很多选项解释.. 但是因为对公式支持度并不好换掉了
如果去插件那里搜一下,其他的 renderer 有非常多. 但是我查了一下,vscode 用的是 markdown-it, pandoc 应该也可以.
hexojs/hexo-renderer-markdown-it: Markdown-it is a Markdown parser, done right. A faster and CommonMark compliant alternative for Hexo.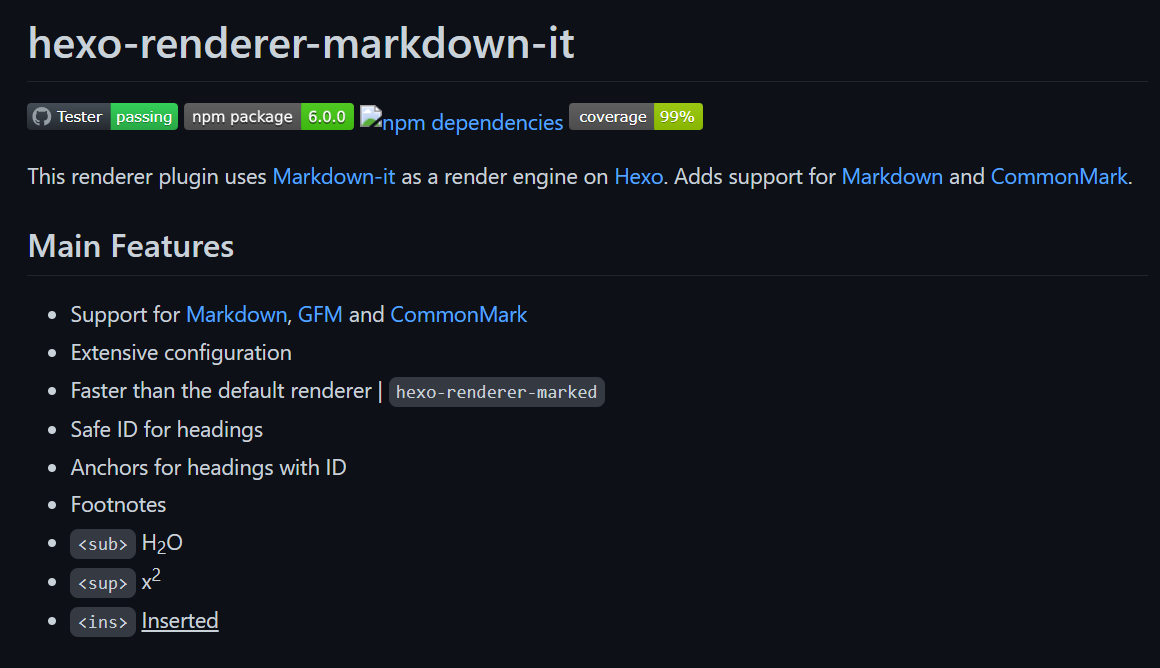
wzpan/hexo-renderer-pandoc: A pandoc-markdown-flavor renderer for hexo.
2022.01.31 选择的是 markdown-it
默认配置是下面这些,挺好的,可以看 GitHub 详细解释. (下面我也复制了一些注释)
1 | markdown: |
建议把需要的 plugins 都 enable 了.. 默认都是禁止的. 详见后面介绍.
关于渲染器对于公式的支持问题,见 这里
markdown-it 插件
Markdown it! 主页!
从这里可以看有什么插件(大概只有官方插件),都有什么用
keywords:markdown-it-plugin - npm search
查找第三方插件
默认插件
下面的是默认集成的 5 个 markdown-it 插件,另外有其他插件可以下载并在这里应用. 例子可见 markdown-it-latex2img 的安装和使用
1 | plugins: |
markdown-it-abbr 缩写插件
1 | *[HTML]: Hyper Text Markup Language |
*[HTML]: Hyper Text Markup Language
*[W3C]:  World Wide Web Consortium

The HTML specification
is maintained by the W3C.
markdown-it-footnote 脚注插件
1 | basic footnote[^1] |
basic footnote[^1]
here is an inline footnote[^2](inline footnote) # 这个测试不管用
and another one[^3]
and another one[^4]
[^1]: basic footnote content
[^3]: paragraph
footnote
content
[^4]: footnote content with some markdown
markdown-it-ins:插入插件(下划线插件)++inserted++ => <ins>inserted</ins>
markdown-it-sub:下标插件H~2~0 => H<sub>2</sub>O
markdown-it-sup:上标插件29^th^ => 29<sup>th</sup>
markdown-it-marked: 高亮==marked== => <mark>inserted</mark>
markdown-it-deflist 定义列表 同 Pandoc - Pandoc User’s Guide
Term 1
: Definition 1
Term 2 with inline markup
: Definition 2
1 | { some code, part of Definition 2 } |
Third paragraph of definition 2.
第三方插件
markdown-it-toc-done-right
因为我可能会用程序自己给标题标序号,并且一般一级标题用来写全文题目. 所以这样设置:
1 | plugins: |
公式
参考资料:
MakerGYT/markdown-it-latex2img: LaTex plugin for markdown-it markdown parser,Place LaTeX Math equation on anywhere as <img> tag.
为 Hexo 寻找一个合适的 Latex 方案 | 鸿雁自南人自北
可以大概明白,markdown parser 原本并不支持公式(至少我安装了 hexo-renderer-markdown-it 后还是不支持),因为它的目的是把 markdown 语法给转化成 html, 而公式其实是扩展了 latex 语法.
所以要支持公式需要添加一些插件,而主流的公式解析要依靠 mathjax 或者 Katex, 有前端后端之分
这个我也不太清楚,似乎一个是自己本地渲染好,例如字符替换,一个是要联网,就比如这个图片
,就是联网获取公式的结果)
<img src="https://math.now.sh?inline=a%3D1%5Cle%201" style="display:inline-block;margin: 0;"/>
还有要用 KateX 似乎必须添加 cssKatex plugin is enabled by default. However, this renderer alone does not work out of the box for mathematical formulas to display correctly on your website. Therefore, you do not need to do anything if you do not want to use Katex. Otherwise, if you want to use katex, you must add this css style to your website: https://cdnjs.cloudflare.com/ajax/libs/KaTeX/0.9.0/katex.min.css
尝试
尝试一 markdown-it-plus
使用 markdown-it-plus 渲染器,说可以支持公式,但是显示不正常…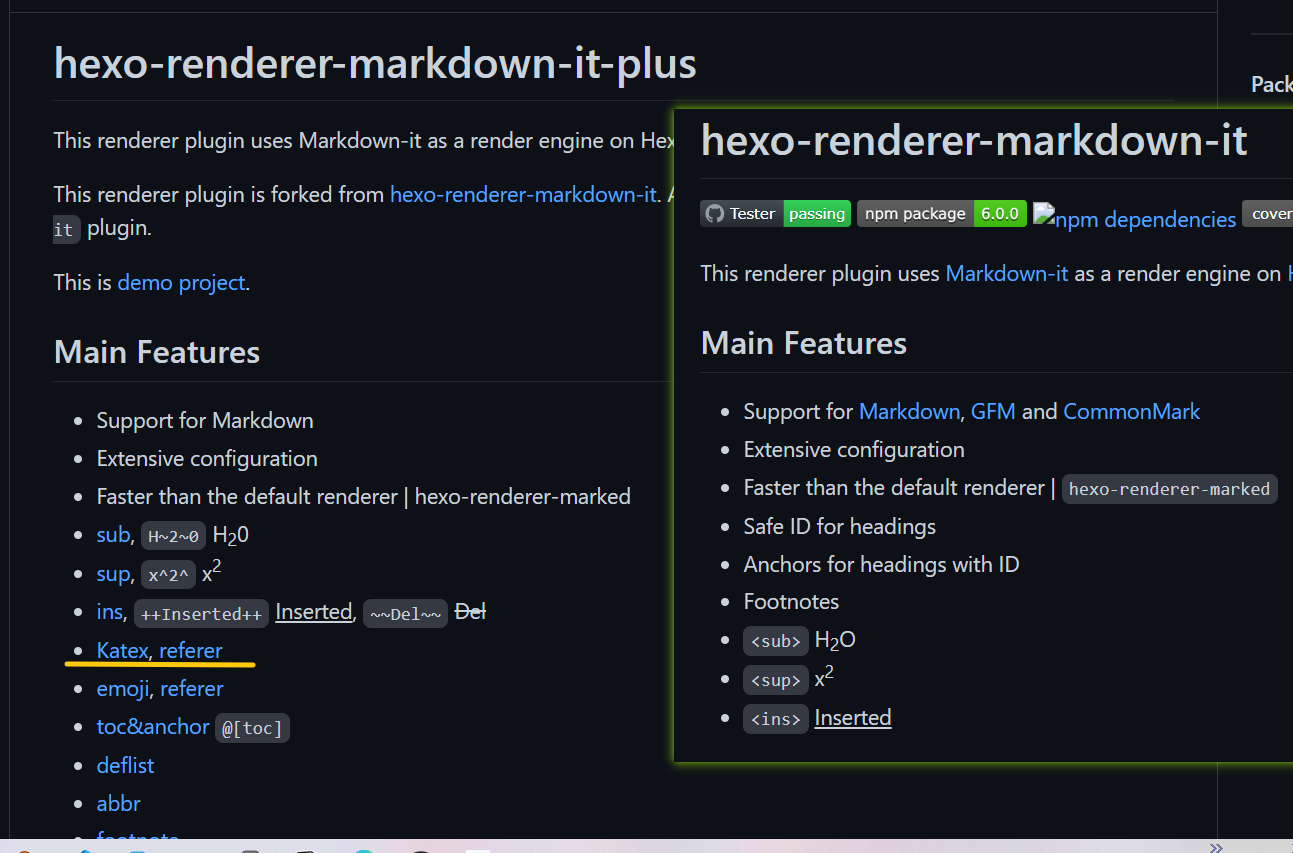
查了一下似乎得修改模板文件,让 html 标题头添加 css 文件.. 不了解,没有尝试.
Katex plugin is enabled by default. However, this renderer alone does not work out of the box for mathematical formulas to display correctly on your website. Therefore, you do not need to do anything if you do not want to use Katex. Otherwise, if you want to use katex, you must add this css style to your website: https://cdnjs.cloudflare.com/ajax/libs/KaTeX/0.9.0/katex.min.css
尝试二 markdown-it-latex2img
安装 markdown-it parser, 并且用 markdown-it-latex2img 插件为 markdown-it 添加数学支持
MakerGYT/markdown-it-latex2img: LaTex plugin for markdown-it markdown parser,Place LaTeX Math equation on anywhere as <img> tag.
不需要做其他任何调整,除了在 markdown-it 的选项中启用这个插件.
效果还是挺好的,看一下代码,
行内公式 :
行间公式(独立成段的) :
就是把公式渲染成了图片。
但是对于我用的 coder 主题而言,效果是公式占满了一行.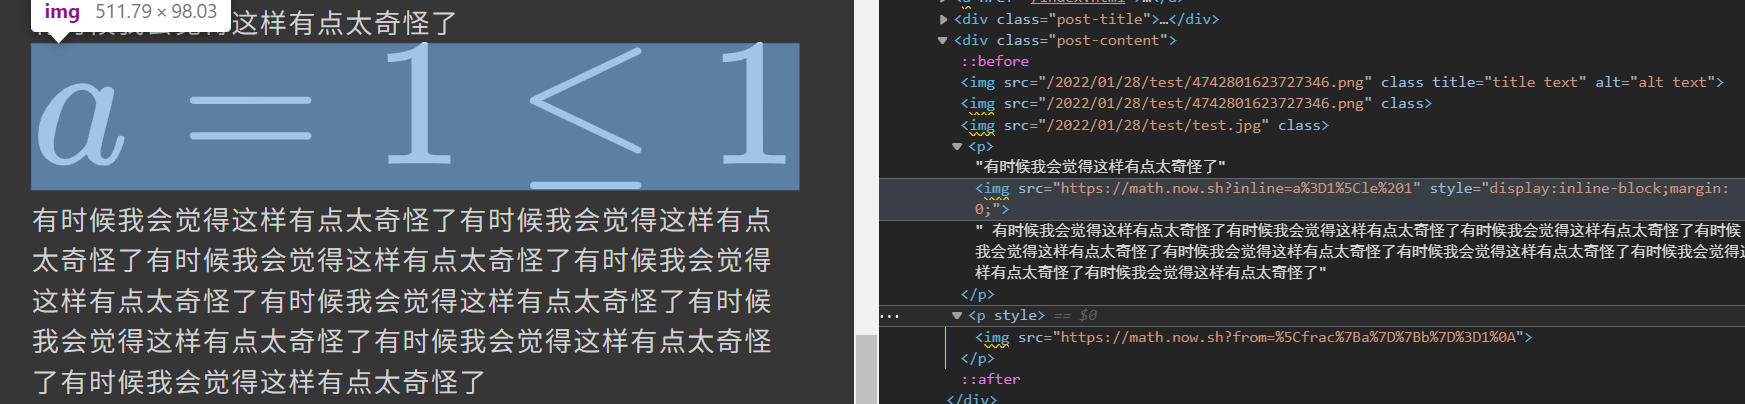
看了下网页代码,发现有一行让图片宽度固定为 100% 的样式文件,来自于 \themes\coder\source\css\_partial\markdown.styl 里面的
1 | .post-content img { |
把这个固定宽度删掉即可。
不过最后没有采用这个方法。尝试三成功了,更容易一些.
尝试三 hexo-filter-mathjax
为 Hexo 寻找一个合适的 Latex 方案 | 鸿雁自南人自北
2020-07-17 更新: 现在推荐所有使用 Hexo 的人都采用 hexo-filter-mathjax 插件,支持 unicode 字符,后端渲染,前端不用外挂 CSS 样式表和 Javascript 脚本。如果想找解决方案可以直接阅读 “Maxjax 后端渲染” 小节。
使用 hexo-filter-mathjax
next-theme/hexo-filter-mathjax: 💯 Server side MathJax renderer plugin for Hexo.
his plugin is a server-side math rendering plugin, which does not depend on any front-end scripts.
不需要其他任何操作!包括修改模板文件
这个插件是把公式渲染成了 svg 图片代码,不需要依靠外部支持. 也不依赖特定的渲染器(虽然 GitHub 主页推荐 pandoc)
hexo 默认的 marked 可能对公式支持不太高.

注意:根据 GitHub 页面以及测试,它不仅支持常规通过 $$ 添加公式. 直接在 markdown 里添加 Latex 公式也会成功渲染!呜呼~
但是建议通过
$$添加公式,因为\有转义问题,想换行的话,不用$$需要 4 个\
默认情况下的设置是下面,可以把every_page设为 true
1 | mathjax: |
其他方案
Hexo 博客支持 KaTeX(回炉版)・大专栏 这个里面写的方案:过程主要分为两大块:修改模板文件添加 katex.min.js 和 安装 katex.min.css、hexo-katex 插件。但是好像结果有缺陷,没有试.
Hexo 构建 blog 时渲染 LaTeX 数学公式的问题 - 知乎 这里写的,安装 hexo-renderer-pandoc 后,公式就能自动正常显示了. 不需要其他配置 (… 没试)
其他
stephencroberts/hexo-filter-inline-assets: Hexo filter that inlines images, CSS, and JS in HTML 据说图片小于规定数值时,图片就会设为 inline, 不错哦
Problems
有时候 deploy 后网页打开发现没有样式.. 不过好像过一会就好了
我用 hexo 部署到 github-pages 上的网页没有样式 - SegmentFault 思否